Site Settings
These settings are specific to your website. Configure your brick-and-mortar store location in Store Information.
Select Configure in the left menu, then select Site Settings to access these settings.
All components and fields with a red asterisk (*) are required.
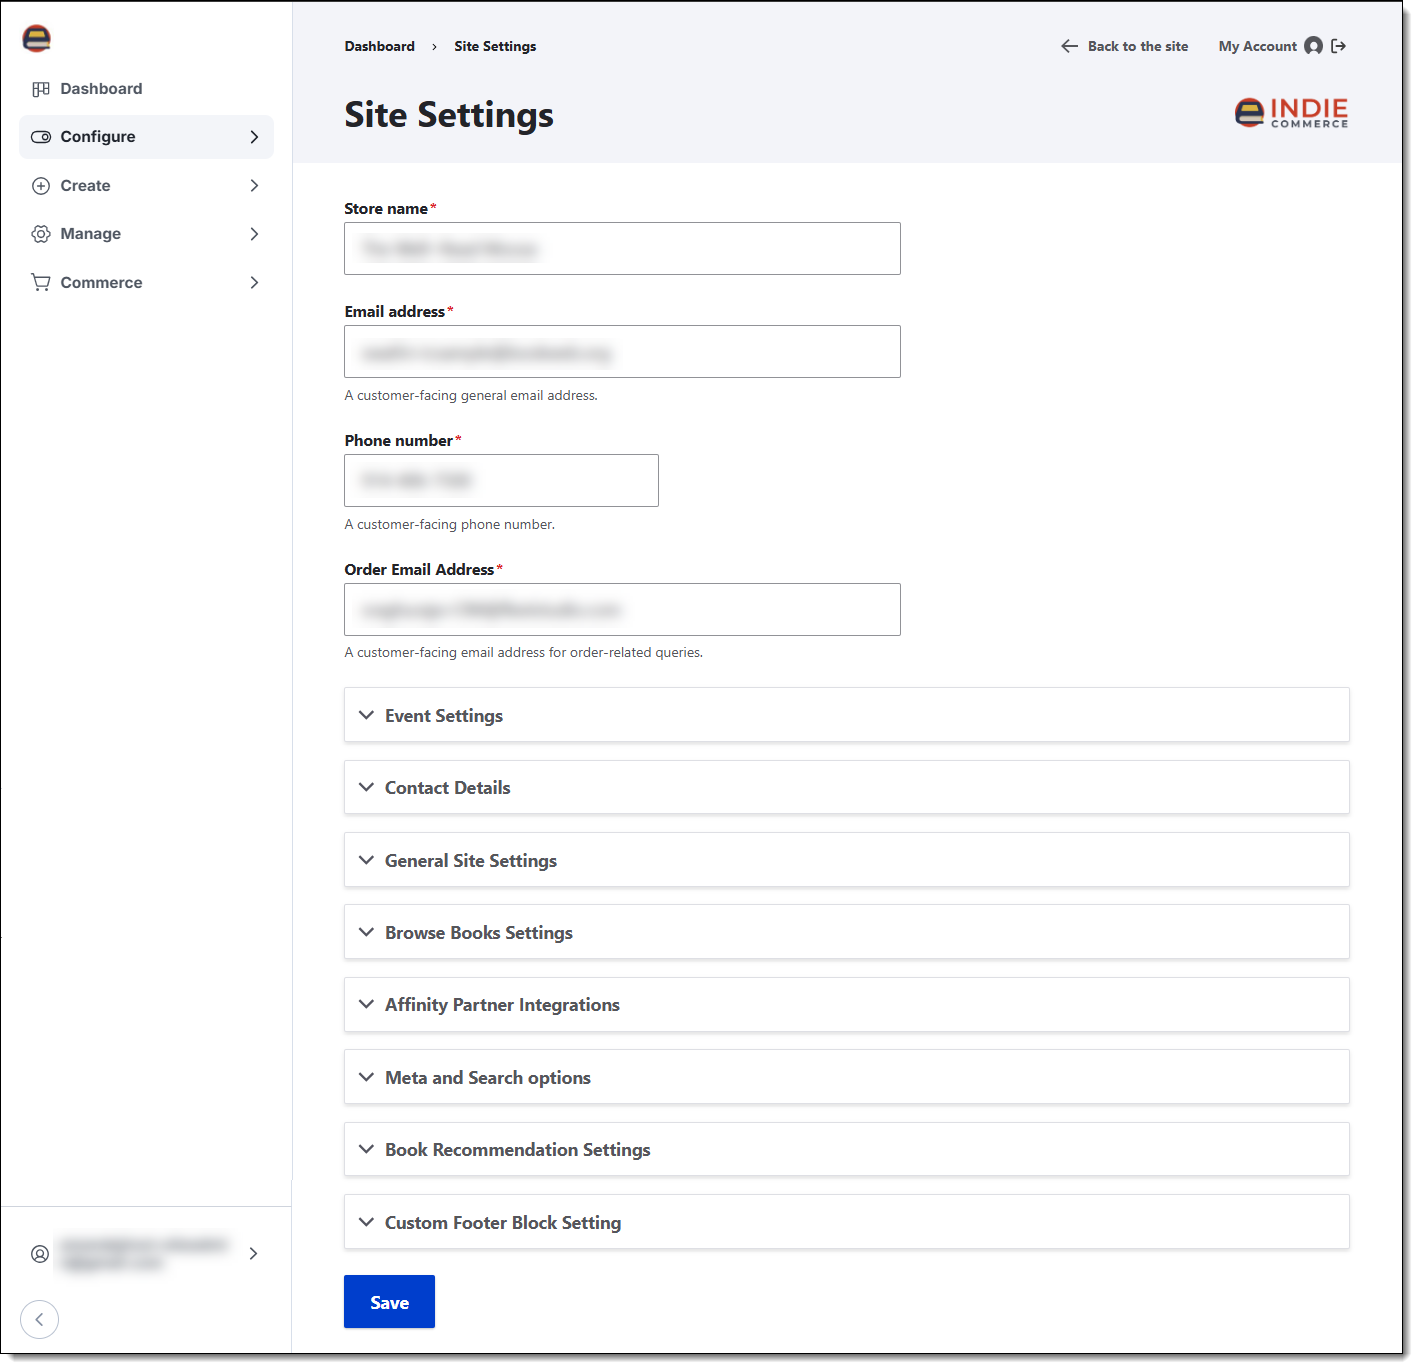
- Enter the Store name used across the site.
- Enter an Email address for general customer-facing purposes. Contact Us and Webform submissions from the website are sent to this email. It is also the Reply to address for most site-generated emails.
- Enter a customer-facing Phone number.
- Enter an Order Email Address that customers use for order inquiries.
Contact Details
Enter contact information that the IndieCommerce team uses to contact store staff. These details are not visible to customers. If the same person is responsible for each role, enter the same information in each field. Please update these fields if a new staff member takes over a specific role or your contact information changes.
The email address for Order Manager email will receive online order notifications, this can be overridden under E-Commerce Settings.
General Site Settings
These settings apply to areas across the website.
Site time zone is used when displaying all dates and times on the website. Select the closest major city if yours is not listed.
Links in Terms & Conditions page is where you add links that display at the top of the Terms & Conditions page. The links could be to other policy pages like the Privacy Policy or Shipping Policy. Skip these until you’ve set up Pages. Start typing the page title to select in URL, or enter an internal path such as /books or an external URL such as https://example.com. Then enter the Link text that displays with the link, such as books. Select Add another item to include more custom links on the Terms & Conditions page.
reCAPTCHA v3 settings are not required. Your website is already configured to use basic reCAPTCHA, which should be sufficient. If you prefer, you can configure this additional reCAPTCHA instead of using the basic reCAPTCHA. Site key and Secret key are provided when you register for reCAPTCHA.
Event Settings
Enter a number of Upcoming Events to list on the Upcoming Events page.
Browse Books Settings
Browse Books Restrictions allows you to determine how restrictive the browse books feature on your site is. You can Restrict only the front page to books featured on the site or Restrict all pages to books featured on the site. Books featured on the site are:
- Books in stock in Local Store Inventory (LSI) (Tier 2, if uploading stock files)
- Books on a Product List
- Books chosen as Staff Picks
- Books with Staff Review
- Books currently on the Indie Next List and Indie Bestsellers
Book Recommendation Settings
Select You May Also Like to display a recommended books carousel on book product and book variations pages. Recommended books belong to the same BISAC categories.
Book Search Settings
Select Enable Search Books in Stock Filter? to allow customers to filter results to what is in stock at your store.
Note: For this filtering feature to function, stock information must be uploaded either through FTP or Above The Treeline; manual uploads are not supported.
Affinity Partner Integrations
Select Libro.fm Audiobooks to display Audiobook as an available format on book details pages. When customers select the audiobook format, they are redirected to your store’s Libro.fm white-labeled site. If you’re using Libro.fm for audiobooks, please contact Libro.fm and share your website URL.
Select Bookshop.org eBooks to display eBook as an available format on book details pages. Then enter your store’s Bookshop.org Affiliate ID. When customers select the eBook format, they are able to purchase the ebooks from the store's Bookshop.org affiliate page.
Select Enable affinity sites for search to display affinity partners (Libro.fm) in search options. Searches for Audiobook redirect your website customers to your store’s Libro.fm white-labeled site for the search results.
Note: Your site must be live for this search to work.
Meta and Search options
These options determine how your store appears in search results and what displays in the browser title bar.
- Default Page Title Suffix is additional text displayed after the Default Page Title. It shows in the title bar of the visitor’s browser. It may also display when a visitor bookmarks the page and in search engine results.
- Site Description is a brief, concise summary of the page with a maximum of 160 characters. Search engines may display this summary in search results.
- Site Keywords are keywords about the page. Most search engines no longer support these.
Custom Footer Block Settings
Select Enable customer footer block if you want to customize the footer block on your pages. If you enable this, configure the Custom Footer Menu using the link provided.
If custom footer is enabled, select Upcoming Events Block to display upcoming events in the custom footer.
Configure Custom Footer
You can have four top-level (parent) menus and several submenu items. The limit ensures the menus fit with the footer design, which ensures that it is ADA-compliant and mobile-friendly.
Site Administrators and Content Editors can create, edit, and delete menu links. All components and fields with a red asterisk (*) are required
Add Menu Link
- Select + Add link.
- Enter a Menu link title that displays in the menu. Top-level menu titles are 20 characters or less.
- Enter the Link by typing the title of a piece of content and selecting it or entering an internal path. Enter <nolink> if you don’t want the top-level menu to link anywhere and only the submenus link to site content. You can enter <front> to link to the front page.
Note: Be sure to use relative links. For example, the URL to the About Us page is mybookstore.com/about-us and the relative link is /about-us. Don’t use the full URL displayed when you view the pages before your site is live because they point to the pre-publication site and won’t work.
- Leave Enabled check to enable the link in the menu. Unselect if you don’t want this link to display yet.
- Enter a Description visitors see when they hover over the menu item and used by screen readers.
- Select a Parent link if this is not a top-level menu item. The menu item displays under the selected top-level link. If you want the same menu link to appear under more than one parent link, create a duplicate link for each parent link.
- Select Save to save the menu link.
- Repeat steps 1 through 7 for each menu link you want to add.
- Select Save to save all menu changes.
Edit Menu Links
- You can Edit and Delete menu links using the Operations column menu.
- Use the drag-and-drop handles to rearrange menu links.
- Uncheck Enabled to prevent the menu link from displaying.
- Select Save to save Site Settings changes.
Save
Select Save to save Site Settings changes.