Help Docs Navigation
Webform
Webforms make it easy to request website visitors to submit specific information. Use webforms to gather information for employee applications, author requests, signups, and RSVPs.
Site Administrators and Content Editors can create, edit, and delete webforms.
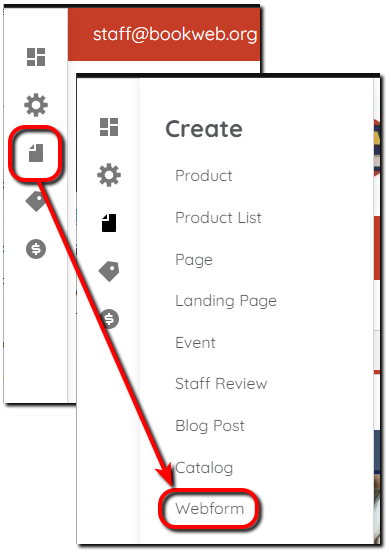
Select Create in the left menu, then select Webform to create webforms.

Add Webform
All components and fields with a red asterisk (*) are required.
Webform Basic Info
- Enter a Title for the webform.
- Enter an Administrative description that is for internal use only. Visitors don’t see this description.
- Select a Category. Select Others and enter a category name to add new categories.
- Set the Status to Open so customers can use the webform.
- Select Save to save the basic information. A page opens with the webform title.
Add Webform Elements
Webforms are made of fields or elements. Select + Add Element to open a pop-up with the lists of fields and elements you can use in the webform. As you build the webform, you can select the View tab at the top to see what the webform looks like.
Element
Examples of elements and when to use them:
- Textarea — Areas where customers enter multiple lines or long text.
- Textfield — When customers enter a single line of text like names.
- Radio Buttons — When presenting multiple options, only one can be selected.
- Checkboxes — When presenting multiple options and customers can choose more than one. For example, asking customers to indicate genres they enjoy reading.
Add elements:
- Select + Add element to configure fields to add to the form.
- Select Show Preview in the upper right to see previews of each element.
- Select Add element to configure the element.
- Enter a Title for the element, then use the advanced settings to configure the field.
- Select Save to save the field or select Save + Add element to save and add more fields.
Page
Pages can split a long webform into multiple steps to make it easier for customers to complete the form.
- Select + Add page.
- Enter a Title for the page.
- Add Page settings and set the Form display.
- Select Save to save the page.
- The page displays in the Build list with an Add element button. Select the button to add fields to the page using the Add Elements steps above.
Test
After building and configuring webforms, you test them to ensure they capture the information. Select Test and the form will be prepopulated with custom random test data, then select Submit to save or send to designated recipients.
Results
This is where you view and manage webform submissions. There are three options under Results.
- The Submissions tab lists all submitted forms. Select a submission number (#) to view the information the customer entered.
- Save submitted results to your computer using the Download tab.
- Clear all submitted forms under the Clear tab.
Manage Submissions
Select the Submissions tab to view all submitted forms. Select a submission to view the form. You can also select Edit in the Operations column to edit the form. In the edit view, select the Notes tab to add notes to the form, star or flag the status, and lock the submission.
